
The Simplest Bathroom Spring Cleaning Checklist to Have in 2019
The Best Bathroom Spring Cleaning Checklist to have for an Effortless Springtime Cleaning
The Spring season may mean warmer days, blooming flowers, and trees growing lush leaves. But what’s important is that it’s also a great time to clean your homes after the stuffy winter we all passed through. We do hope you’ve read our previous guide detailing how to give your bathroom a spring clean. We felt our readers could also greatly benefit from a handy bathroom spring cleaning checklist , that they can have printed out and posted somewhere to just make the whole process a lot easier.
Getting our homes clean and tidy may be a cumbersome task, but it is often so rewarding that we can’t help following a good routine to help us out. With now temperatures hitting almost comfortable and pleasant, one thing sure to pop up in our heads, in this time of the year, is the spring cleaning ritual. By using the spring cleaning checklist bathroom , you are not only ensured of a clean and organized space but would also be able to complete the cleaning in a systematic manner without leaving out any crucial tasks in hand.
Handy Bathroom Spring Cleaning Checklist – To Print
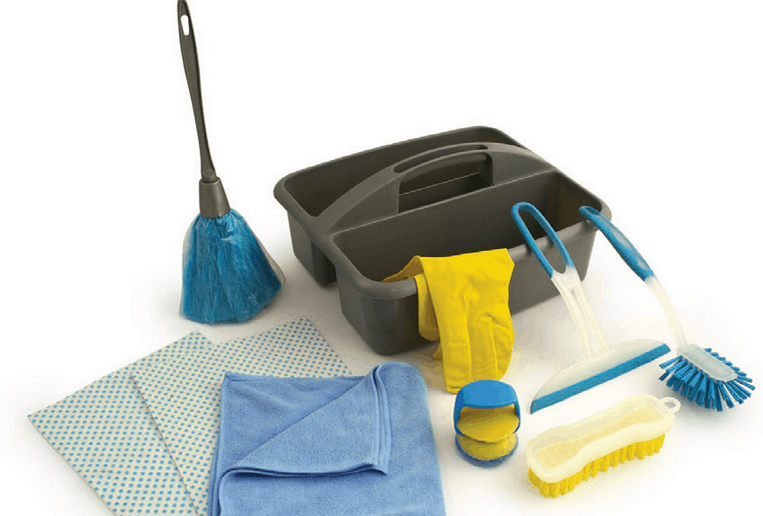
Make sure to have all the items with you mentioned in this bathroom cleaning checklist . Sometimes, you may use alternatives if you can’t find the exact item.
- Trash bags, and clutter box for storing other times
- Broom and dustpan
- Mope and vacuum
- Microfiber clothes which clean dirt and grime better than other conventional ones
- Spray bottles which can have a homemade mix or an all-purpose cleaner
- Step stool or ladder
- Toothbrush
- Rubber gloves
- Buckets of hot water
- Baking soda and vinegar to get rid of stubborn soap suds
- Dish soap
- Toilet and floor cleaner

Additional Supplies
Other than the general supplies, there are yet other varied items that, though not absolutely necessary, are great to have in your arsenal. Some of these are –
· A Floor Steamer that can work appreciably against floorings involving tile, stone, carpet, wood, etc. From removing stains of food spills to cleaning up paw and footprints, floor steam can come exceptionally handy.
· A Dusting Kit, comprising of Mitt or Dusters and is great for removing cobwebs and reaching untouched high regions of ceilings and walls. A squeegee attached to a pole could do the trick of reaching high locations.
· Essential Oils, which can be great to add fragrance.
· OxiClean Stain Remover (or any other brand) - Oxygenated bleach can be a safe alternative that doesn’t affect the colour of your bath furnishings and clothes. It can easily clean grime from your heavily stained tiles or any other bath surfaces.
Tips on Spring Cleaning Bathroom
1. The Planning
Before heading to the actual bathroom spring cleaning ritual, there is little planning required. In other words, a proper preamble to the cleaning process is absolutely essential. So what exactly are they?
i. Gather supplies
ii. Quick de-clutter
iii. Take out laundry

i. Gather all the supplies in the bathroom spring cleaning checklist required before you begin cleaning, as any time you leave to get an item, it provides a chance to get distracted and derail the whole process. Also, remember to keep your bathroom well aerated with your windows wide open to let air circulate through your room.
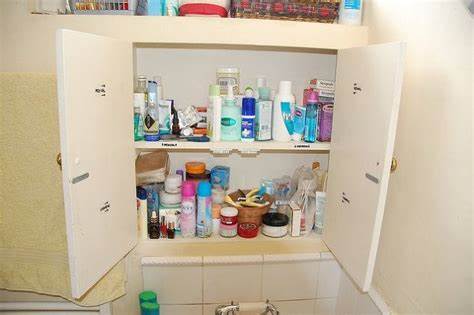
i. Quick de-cluttering - Start from removing items that don’t belong in the bathroom such as coffee cups, jewellery, and hair clips returning them to their respective places. You can also have a lot of items occupying your countertop, cupboards, vanity, around the tubs, back of the toilet tank or window sills, etc. Clear them out throwing it in trash bags or storing in clutter box to be put away later.
Next, Empty the trash can and give it a good cleaning spraying it with disinfectant and scrubbing it thoroughly. Simultaneously, take a microfiber cloth wiping the surfaces from which you have cleared the items especially those in which you intend to return the materials right away.
i. Take out the laundry - In this step, make sure to clear out any and all piece of clothing or fabric, whether they are towels, shower and window curtains, washcloths or linen. While the dirty clothes require a trip to the laundry, the clean ones can be placed in a basket and stowed away. Also, pick up rugs or mats giving them a good dusting and check if they need a wash.
In case of washing them at home, a cup of vinegar won’t hurt your hard fabrics, as they render them a fresh look while also eliminating any bad odour. Also, washing with warm to tepid water is better than cold water as it works better in cleaning out hard stains and killing allergic and harmful agents.
How to get Organized quickly
Does your bathroom always seem to acquire stuff overtime until you get confused as to how to deal with it all? Check out this article on the best way to organizing your bathroom by utilizing organizers and shower caddies.
One of the best ways to declutter your bath space is by making use of the ShowerGem shower caddy to store your bath essentials in one place. Not only is it rust-proof and easy to install, but also comes with a 30-Days hassle-free return policy.
2. Preparation to Spring Cleaning
In any thorough bathroom spring cleaning , the rule of thumb is to start from the top and work your way down, similarly covering from one side to another so that cleaned areas aren’t going to get messed up again.

Pre-clean
Pre-cleaning involves starting off with a dry microfiber cloth wiping away dust, grime and other agents that may be sticking to the surface. By indulging in a little pre-cleaning, you can easily prevent dirty splotches which come about with water use.
Wipe! Wipe!
With pre-cleaning done, the next step involves a soap wash. Using a wet wipe or a cloth dipped in soapy water, wipe all possible surfaces – from sink to vanity, handles, door knobs, jambs, window sills, drawer fronts, and baseboards, etc. Wipe down the insides of emptied medicine cabinets and toiletry cabinets while also cleaning cabinet doors. To summarize, wipe all surfaces clean and shiny.

3. Important Bathroom Spring Cleaning Techniques
While we’ve already covered the detailed bathroom spring cleaning process in an earlier article, we’re going to brush up on some of the most important steps you shouldn’t miss out on.
· Dusting
It is not just the accessories in the toilet that can pile up with dust, as your walls and ceilings are further prone to dust and grime build-up. Take a long handle dusting tool or brush to reach the ceiling, top vent, window frames, walls or other tough-to-reach and high region areas and wipe it clean. Not to mention, but the mere act of dusting can help keep your bathrooms look tidy and spotless.
· Cleaning the Walls
Take a 1:1 ratio of water and vinegar or detergent mix along with warm water to wipe your walls down. Concentrate especially on regions around the sink and toilet, as often these places are left neglected. In case of marble or other stone backsplashes, do not use vinegar. Instead, a steam cleaner or a mild bleach can come in handy.

A water-vinegar mixture is great for cleaning your bathroom walls

Some of the bathroom fan vent covers are easily removable and can be cleaned
· Cleaning Exhaust Fans
Take a step stool, and climb on top carefully to remove the fan vent covers and other light fixtures that are easily accessible. Once removed, first wipe them clean to remove any dust after which splash hot water and scrub it with soap and sponge. The blades of the fan and vent cover can be home to a myriad of dirt, and thus, a little soaking can give you better results. With that done, clean it dry with a lint-free cloth or use a vacuum brush attachment to blow-dry it.
· Cleaning Light Fixtures
Taking a fresh set of microfiber clothes and start wiping the bathroom’s fixtures, sconces, and switches clean. It is important to remove dust or loose debris sticking to them before spraying a light mixture of vinegar and water. Once that is done, wipe it clean with another cloth to render it dry. However do take care to not go overboard with water and remember to keep a 1:1 ratio of water and vinegar as it can work quite the magic.


· Spring Cleaning Bathroom Windows
Window treatments can differ from one home to another, but one thing common to all is that over time, they bear a thick coat of dust and grime making it very unsightly and unhygienic. First, take down any curtains or safety nets that are fixed to your window and put them for a wash. Second, gently dust your blinds and spray it down with a solution of dish soap and water. Third, scrub it gently in case of stubborn grime and dirt splatters. With that done, finally, take a napkin and wipe it clean and dry. A little mix of vinegar would greatly improve your cleaning.
· Scrub the Toilet
Toilets need a bit of incessant scrubbing and washing to achieve deep cleaning. Scrub the insides of the toilet, focusing on the under rim and crevices with a brush and cleaner. You can also use a combination of baking soda and vinegar, spraying it on the bowl as it will both disinfect and eliminate bad odour. After which, nicely scrub away and flush it. Likewise, Use a microfiber cloth to clean the exterior of the toilet, the handle, and water flush, etc.

· Cleaning the Floor
With your rugs and bath mats already cleared out, this is an ideal time to clean your bathroom floor. From wiping along baseboards to removing dirt stains, vacuuming or sweeping the floor, engage in the best cleaning method suited to your flooring. To get more detailed information, we urge you to check out our previous article on the best way to clean Shower Tiles.
You can also use a mop and steam clean for a more hygienic and neat finish. Additionally, a little extra attention towards the edges and around toilet regions wouldn’t hurt either. Another step to not miss is to clean out the drain covers and vents that occupy the floor.
· Final Touch
With all the major cleaning tasks done, a few steps culminate the final finish up of the bathroom spring cleaning checklist routine. Flush the toilet, replace the laundry and towels displaced with new and fresh ones, return the mats and rugs, and put on the cleaned shower and window curtains, if any. Check for any spot you might have missed while also ensuring if all the necessary elements, be it the trash can, fresh linen or soap are all returned to their original spots, and voila, you are done!
Happy Bathroom Spring Cleaning!