
The Definitive Guide on How to Clean Your Shower Tiles
Shower Tile Cleaning Made Easy Using Home-made Cleaning Agents
Bathrooms are one of the most commonly used spaces in our homes and also the ones that are most prone to dirt and grime. While many of us try to keep our bathrooms as tidy and organized as possible with our closets scrubbed and cleaned, we often don’t care about the tiles as much as we should.
Sure, that new shower caddy you got can unclutter your bathroom a lot. But it doesn’t take care of everything.
The newest bathroom trend for 2019 is all about keeping your bath space grime and dirt-free. Be sure to also check out our handy guide to bathroom spring cleaning. Most of the times, the floor and wall surfaces tend to bear the brunt of moisture, dirt and soap suds, and are left asking for help. Even if we wipe or mop the surfaces, there is always a blob of dirt sticking somewhere or the other. And if you have kids or pets, the issue only gets worse. One is then left staring at discoloured grimy tiles and, not to forget, a brown tinted tile grout.
Messy grout isn’t just an eyesore, as the porous nature of it acts as a breeding ground for bacteria and other fungal growth. It is not something we want in our bathrooms now do we?
So, after looking for some effective ways for cleaning grout, we have gathered the most ideal ways of cleaning your shower tiles utilizing the best cleaning agents.
Best Way to Clean Shower Tiles UK
Cleaning the shower tiles is a simple process, but it may become time consuming especially if the grime in your grout is too thick and stubborn as it can involve a fair amount of planning and working. Here is a breakdown of how to go about the task at hand.
Pre-treatment of scum


The initial step is pre-treating the soap scum or prepping the area before the actual scrubbing. Start with running your shower for a good 5-10 minutes with temperature notched all the way high. Hot water and steam can easily open up the pores and loosen up the dirt particles, making it easy for cleaning.
With that done, you can now fashion out your very own DIY cleaning agent. Though there is a myriad of choices available online on how to make your own cleaning agent, not all are effective, or cheap.
After testing and reading through several ones, a water-vinegar solution is aptly suitable for pre-cleaning grime and dirt. All those who’ve had asked questions like, “ How to clean shower tiles with vinegar?” will find answers here.
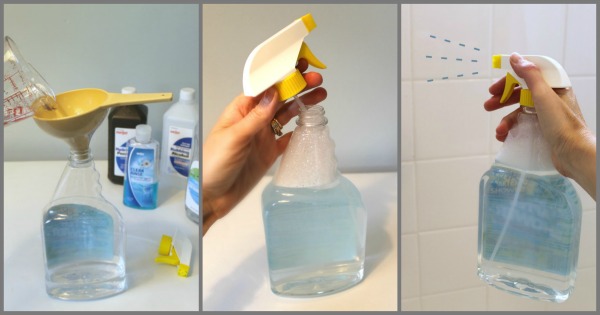
- Take a part of vinegar and mix it with a part of the water in a 1:1 ratio. Fill it in a spray bottle and spray the solution over the wall and floor tiles. Start with the wall tiles and proceed next to the floor tiles. Concentrate on the tougher and dirtier regions, spraying an ample amount of the solution especially on the grout lines.
- Once done, let the solution sit for a good 5-10 minutes for the vinegar to work its magic. It will loosen up the grime and dirt sticking to your tile surface. However, in case of exceptionally dirty and stubborn ones, you may even need to let the solution sit for more than 30 minutes or so.
- Scrub the surface using a grout brush or any old toothbrush that may be lying around your house. Use a stiff brush with hard bristles as it can easily scrap the dirt and soap scum making the cleaning that much easier. Since grout is porous in nature, water normally percolates down allowing for dirt and bacteria to act upon. Scrubbing releases the dirt which, then, can be washed away.
- After that, rinse your tile surface with ample water. You can let your shower run for another 5 minutes or use a bucket of water to splash away the remnants of the scum and vinegar. The water doesn’t have to be hot like before, but just warm or lukewarm.
Cleaning Shower Wall Tiles
While floor tiles can give you ample space for scrubbing, wall tiles, especially those near the ceiling can be hard to reach. In order to clean them, spray your cleaning agent across the tiles. Let the shower run for 5 minutes with the heat notched all the way high.
Close the door to the shower area to let the steam act on the cleaner. After a good 20 minutes, wipe down the surface using a clean cloth. For tiles that are high up, use a microfiber mop to wipe it clean and dry. Only after finishing your wall tiles, start on your floor.
Thorough Cleaning
The next step entails the primary cleaning process. Like mentioned before, there are a lot of cleaning agents which can be fabricated at home, with detergent, vinegar, lime, and caustic soda; however, the mix of baking soda paste preferably with hydrogen peroxide is the most effective and affordable option.
How to clean shower tiles with baking soda, you ask? Just follow these steps –
Step 1 – Prepare the cleaning agent

Things you need - Baking soda, water, bowl and a brush/sponge
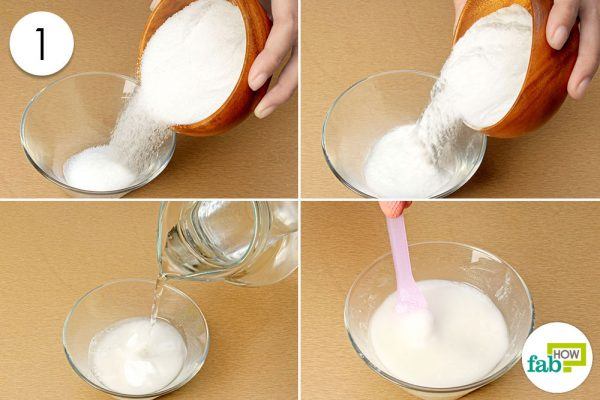
Mix them as per the ratio given below and to turn into a paste
- Take 3 parts of baking soda and mix with 1 part water. Mix them well in a bowl until a thick paste of baking soda is formed. It should have a pretty good consistency, almost like cake batter. If the paste seems too watery, add a bit of baking soda to get the required thickness.
- For difficult stains or grime that is too hard to remove, add hydrogen peroxide to the mix. When adding it, make sure you half the amount of water substituting the rest with hydrogen peroxide. So your new baking soda paste should be of the ratio 3:1/2:1/2.
- Now apply the paste onto the tile surface using a sponge. Spread it nicely across the surface. In fact, use a generous amount on the grout lines to clean out the scum and grime effectively.
Step 2 – Persistent scrubbing
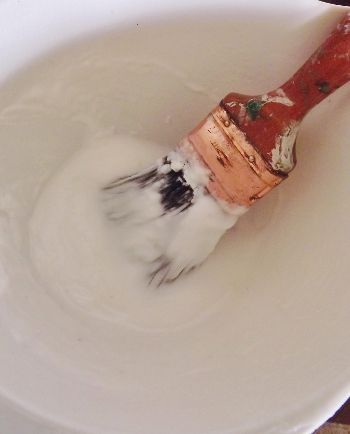

- Take a stiff scrub brush and clean the surface in circular motion. Use optimum pressure on the brush to remove the stains and grime while not scratching the surface. A stiff-but-not-sharp bristled brush can come exceptionally handy for this.
- Tough stains can be quite a headache, but letting the soap sit for some time followed by incessant brushing can just do the trick. For the crevices, use a toothbrush.
- If you still face a stubborn stain, a little bleach can be made use of. Dip your brush in bleach and scrub it on the stained or grime-filled area; and wash it with plenty of water. Before using bleach however, make sure you are wearing a cloth across your nose and the bathroom is well ventilated.
- Bleach, which has a pH of 12, is highly basic and corrosive in nature. It can produce terrible fumes and skin irritations. So limit to using bleach only when most necessary. For basic cleaning, your household agents should suffice.
Step 3 – Rinse it off

- With the scrubbing done, rinsing the tile surface is the next step. Like mentioned before, splash warm water onto the scrubbed tile surfaces washing away any soap or dirt sticking to it.
- Use a mop to give the entire floor a thorough wipe while also adding a bit of floor cleaner or detergent. After mopping, rinse twice or thrice with ample water to remove the remnants and soap suds.
- Though many of us tend to neglect, it is best to wipe the surface clean and dry after rinsing, as water stagnating at the ends or crevices can lead to mould and mildew growth. So take a clean cloth and wipe the surface dry.
Another proportion for you to try
You can also try other proportions of baking soda for the cleaning agent. A homemade mix of baking soda, say about half a cup, followed by a quarter cup of hydrogen peroxide and a teaspoon of dish soap is very ideal for cleaning grout. Squirt the mixture onto the grout and let it sit for 10 minutes.
Are you wondering why baking soda and hydrogen peroxide are perfect ingredients for a cleaning agent? Baking soda, which is a bit abrasive in nature, can effectively loosen up the dirt particles without causing any damage to the tile surface or the indoor air quality. Hydrogen peroxide serves as a fitting replacement for bleach as it can double down on germs without being toxic in nature.
Preventing Build-up of Dirt & Grime


We now know how to clean tile shower grout and grime, but we also need to know how we can avoid such build-ups.
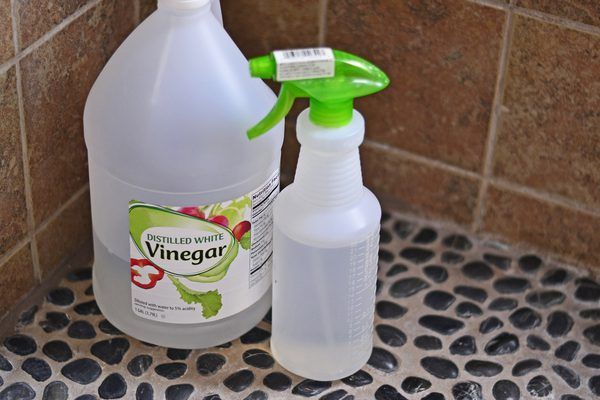
- Fashion out a vinegar solution and store in a spray bottle. After showers, take the solution and spray it on the tile surface at least two to three times every week. Doing this will prevent mildew or dirt from accumulating.
- Label the bottle as shower spray and keep it away from the reach of children and pets.
- A squeegee is super convenient for wiping your bathroom floor. Also, use a squeegee after every time you shower.
- Designate separate towels for wiping your tile surfaces. After showering, take a clean towel and wipe off the tile surface to render it dry. Though it may seem painstaking and requires extra work at the beginning, you would have a clean bathroom with no stubborn or ugly stains in the long run.
That concludes our guide to cleaning your shower tiles. Now that you have a clear idea, you can bid goodbye to dirty grout and discoloured tiles. With these household agents, you can now have a clean and speckle-free bathroom in no time!